We all know that angular’s *ngIf directive displays or removes an element from DOM based on given condition.
Take a look at the below example.
<div *ngIf="display">Hi I am Visible</div>
If the display property is true then <div> element will be added to the HTML DOM.
What if we want to display an alternate HTML, if the *ngif condition is false?
Initially, I used to write two *ngIf blocks to handle these kinds of scenarios as shown below.
<div *ngIf="display">Hi I am Visible</div>
<div *ngIf="!display">Hi I am Visible Only if display is false</div>
But it’s kind of odd to write such *ngIf blocks to handle simple if else conditions.
And I don’t know whether it’s a correct way. And it will create multiple subscriptions if we are using an observable inside *ngIf.
So I dig more into *ngIf directive and learnt how to write *ngIf else in angular.
How *ngIf directive will work?
The reason why I wrote two *ngIf blocks is I don’t know how *ngIf directive works in Angular.
In traditional programming languages, will be writing if else conditions using flower brackets as shown below.
if(condition){
// then block
}else{
//else block
}
But *ngIf is a directive, that means we are applying if else conditions on HTML elements directly.
<div *ngIf="display">Hi I am Visible</div>
If you are coming from php or asp.net background, we can directly write if else blocks in HTML templates as shown below.(just a sample code syntax might defer in php and asp.net)
if(display){
  <div>Hi I am Visible</div>
}else{
  <div>
  Hi I am Visible Only id display is false
  </div>
}
But we cannot write if else blocks using flower brackets in HTML. Because our HTML file should only contain markup elements.
The ideal solution will be, we should replace if else condition blocks with some html markup element something similar like below.
<IfBlock value="display">
   <div>Hi I am Visible</div>
</IfBlock>
<ElseBlock>
  <div>
  Hi I am Visible Only id display is false
  </div>
</ElseBlock>
Are you convinced are confused? That’s what exactly *ngIf directive will do.
How you ever thought about asterisk(*) before the structural directive ngIf?
When we write *ngif directive with HTML elements, angular will place that element inside a <ng-template> tag with the given condition.
<div *ngIf="display">Hi I am Visible</div>
The above *ngIf will be converted to <ng-template> mark up as shown below.
<ng-template [ngIf]="display">
   <div>Hi I am Visible</div>
</ng-template>
The asterisk is just a syntactic sugar to ng-template element.
<ng-template> is a pseudo element in Angular framework and it won’t be added in final HTML result. Only the elements inside the <ng-template> will be added.
If the elements has any attributes like id or class etc. Those will be added to the <div> element inside the <ng-template>.
<div *ngIf="display" class="information" id="info">
 Hi I am Visible
</div>

<ng-template [ngIf]="display">
   <div class="information" id="info">
     Hi I am Visible
   </div>
</ng-template>
As *ngIf is a directive, we can add it to any HTML element.
<p *ngIf="display">
  Visible only if display is true
</p>
Or we can apply it to other angular components, for instance, material checkbox Component
<mat-checkbox *ngIf="display">
  Material Checkbox
</mat-checkbox>
And If you see the generated HTML,no element will be added to the DOM if ngIf expression evaluated to false. (because ng-template condition evaluated to false)
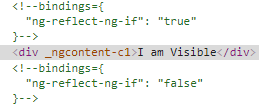
ngif
So why angular will remove the element rather than hiding it. Go through the below article to understand it further.
Difference between ngIf and hidden in Angular
Writing *ngIf else in Angular
Now we will learn how to write *ngIf else in Angular.
As explained above, we need to declare an else block. We will be using <ng-template> element to write the else block.
<ng-template [ngIf]="display">
   <div>Hi I am Visible</div>
</ng-template>

<ng-template>
   <div>
    Hi I am Visible Only if display is false
   </div>
</ng-template>
I have added a new <ng-template> block which will be added only if the condition is false.
But there is no relation between two elements. We need to tell Angular framework that load the below <ng-template> else block if the condition is false.
For that purpose we have to give a label to the else block element as shown below.
<ng-template [ngIf]="display">
   <div>Hi I am Visible</div>
</ng-template>

<ng-template #elseBlock>
   <div>
    Hi I am Visible Only if display is false
   </div>
</ng-template>
And by using [ngIfElse] property we can refer the else block as shown below.
<ng-template [ngIf]="display" [ngIfElse]="elseTemplate">
   <div>Hi I am Visible</div>
</ng-template>

<ng-template #elseBlock>
  <div>
    Hi I am Visible Only if display is false
  </div>
</ng-template>
Now you might be thinking that should we use <ng-template> without asterisk to write *ngIf else?
No.
We can simply pass else template *ngIf directive as shown below.
<div *ngIf="display; else elseTemplate">
   Visible when display is true
</div>

<ng-template #elseTemplate>
   <div>
      Visible when display is false
   </div>
</ng-template>
And this template can be defined anywhere in the component view as shown below.
import { Component, OnInit } from '@angular/core';
@Component({
selector:'app-ngifelse',
templateUrl:'./ngifelse.component.html',
styleUrls: ['./ngifelse.component.css']
})

export class NgifelseComponent implements OnInit {
   display:boolean;
   constructor() {
    this.display=true;
   }
   ngOnInit() {}
}

//*ngIf else Component View
<ng-template #elseTemplate>
  <div class="alternative">
      Visible when display is false
  </div>
</ng-template>
<div>
  This example explains how to write *ngIf else block
  in Angular.
  And ng-template block can be defined anywhere in
  the component view
</div>
<div *ngIf="display; else elseTemplate" class="main">
   Visible when display is true
</div>
I have declared else template above the *ngIf block in NgIfElseComponent view.
But as a good practice and to improve readability it is better to define it right below the ngIf block.
And this template can be reused in other *ngIf else blocks as well.
For example, data in a HTML page can be displayed by using different ajax calls from the server.
In that case while getting the data, We can show loading.. template which can be reused in multiple places as shown below.
<div *ngIf="display; else elseTemplate">
   //Displaying data from server
</div>

<ng-template #elseTemplate>
   <div>
      Loading...
   </div>
</ng-template>

<div *ngIf="isReceivedData; else elseTemplate">
   //Displaying data from server
</div>
*ngIf then <ng-tempalte>
Now you might be thinking that, what if we want to reuse the HTML which is placed inside *ngIf element.
For example, in an online shopping website product details can be displayed in multiple places depending upon the size of the device i.e., mobile device one place and in desktop other place.
//below the product image
<div *ngIf="isMobile">
   //User Details
   <span>{{Name}}</span>
   .....
   .....
</div>


//Right side of the product image
<div *ngIf="isDesktop">
   //User Details
   <span>{{Name}}</span>
   .....
   .....
</div>
The html written inside the *ngIf element is called as “inline template” and will be added to the DOM if the condition is true
Instead of writing product details (inline template) HTML in both places, we can place them inside a <ng-template> and reuse it in both places by referring that template in *ngIf directive using [ngIfThen] property.
<ng-template [ngIf]="isMobile" [ngIfThen]="productDetails">
</ng-template>

<ng-template [ngIf]="isDesktop" [ngIfThen]="productDetails">
</ng-template>

<ng-template #productDetails>
  //User Details
   <span>{{Name}}</span>
   .....
   .....
</ng-template>
Again we can use short hand notation for then template instead of using [ngIfThen] as shown below.
<div *ngIf="isMobile; then productDetails;">
</div>

<ng-template #productDetails>
  //User Details
   <span>{{Name}}</span>
   .....
   .....
</ng-template>

<div *ngIf="isDesktop; then productDetails;">
</div>
Now we can reuse the #productDetails template in both places.
Now we will see what happens, if we use both then template & inline template in *ngIf directive?
<div *ngIf="isMobile; then productDetails;">
  //Product Details
   <span>{{Name}}</span>
   //This is inline template
</div>

<ng-template #productDetails>
  //Product Details
   <span>{{Name}}</span>
   <span>{{Description}}</span>
</ng-template>
If you see the final output both Name and Description will be visible in the webpage.
Inline template will be ignored if *ngIf contains alternative then template.
*ngIf else & then templates
We can use both [ngIfThen] & [ngIfElse] template references along with *ngIf directive.
<div *ngIf="isMobile; then shortProductDetails; else productDetails;">
</div>

<ng-template #shortProductDetails>
  //Product Details
   <span>{{Name}}</span>
</ng-template>

<ng-template #productDetails>
  //Product Details
   <span>{{Name}}</span>
   <span>{{Description}}</span>
</ng-template>
The syntax is similar to ternary operator.
ngIf = condition ? then : else;
At runtime the above code snippet will be converted to
<ng-template [ngIf]="isMobile" [ngIfThen]="shortProductDetails"
[ngIfElse]="productDetails">
</ng-template>


<ng-template #shortProductDetails>
<div>
<span>{{Name}}</span>
</div>
</ng-template>

<ng-template #productDetails>
<div>
<span>{{Name}}</span>
<span>{{Description}}</span>
</div>
</ng-template>
We can change the then or else template references dynamically at run time by taking advantage of these [ngIfThen] and [ngIfElse].
Go through the below article to understand it further
Dynamically Change NgIf, Then,Else Templates At Run time In Angular
Using *ngIf with multiple conditions
What if we want to use *ngIf with multiple conditions to display an element in the DOM?
And it’s very common scenario.
In our traditional programming languages we can use logical operators like AND, OR and NOT inside an if condition.
AND condition in *ngIf
We can use multiple conditions in *ngIf with logical operator AND (&&) to decide the trustworthy of *ngIf expression.
If all conditions are true, then element will be added to the DOM.
<div *ngIf="isMobile && isTablet">
  //Prodcut details
  <span>{{Name}}</span>
</div>
OR condition in *ngIf
Similary If you want to display the element with *ngIf only if one of the condition is true. We can use OR (||) operator.
<div *ngIf="isDesktop || isTablet">
// Show Price comparison chart
</div>
NOT condition in *ngIf
We can use NOT operator(!) to invert the *ngIf condition as shown below
<div *ngIf="!isDesktop">
//Show Mobile Navigation Menu
</div>
We can combine these logical operators with as many as conditions in *ngIf directive.
<div *ngIf="(condition1 && condition2) || condition3"></div>
Checking null or undefined with *ngIf
We mostly deal with objects while displaying data in Angular.
So it’s very common for us to forgot or initialize objects before displaying them in HTML.
In that case we will get “Cannot read property of undefined” errors in console.
import { Component } from '@angular/core';

@Component({
  selector: 'my-app',
  templateUrl: './app.component.html',
  styleUrls: [ './app.component.css' ]
})
export class AppComponent  {

   productItem : Product;
   constructor(){

   }
}

interface Product{
  id: number;
  description: string;
  type:string;
}

//app.component.html

<div>
{{productItem.id}}
{{productItem.description}}
</div>
We can use safe navigation operator ? to check for null or undefined.
<div>
{{productItem?.id}}
{{productItem?.description}}
</div>
The problem is for each property we display, we have to use safe navigation operator.
To handle such scenarios, we can check if the object is undefined or null using *ngIf before displaying the data as shown below.
<div *ngIf="productItem">
{{productItem.id}}
{{productItem.description}}
</div>
Compare Strings for equality using *ngIf
To compare string for equality we can use double equal(==) or triple equal(===) operator inside *ngIf expression.
<div *ngIf="product.type === 'electronics'">
// Show electronics products related data
</div>
It’s very common to misplace or forgot to use double equal or triple equal and people tend to use assignment operator (single equal) while compare strings for equality.
You will get “Parser Error: Bindings cannot contain assignments at column” error when you use an assignment operator inside *ngIf as shown below.
<div *ngIf="product.type = 'electronics'">
// Show electronics products related data
</div>
We should use quotes while comparing with staitc string inside an *ngIf.
To compare with other component string variables no need to use quotes.
<div *ngIf="product.type === typeOfProduct">
// Show electronics products related data
</div>
Checking array length with *ngIf
In some cases we want to display array of elements only when array length greater than zero.
In that case to check array length and display else template pass conditional expression array.length > 0 to *ngIf.
export class AppComponent  {

   productItems : Product[];
   constructor(){

   }
}

<div *ngIf="productItems.length > 0">
// Display elements
</div>
If you execute above code you will get “Cannot read property ‘length’ of undefined” error, because the array is not initialized.
To avoid “Cannot read property ‘length’ of undefined” error, we have to use safe navigation operator(?) while checking length of array.
<div *ngIf="productItems?.length > 0">
// Display elements
</div>
Using *ngIf as variable
In the above example we are using productItem object to display product details in component html file.
Instead of using productItem component variable, we can save it in a local variable (for instance product) using as syntax so that it can be used in component template.
<div *ngIf="productItem as product">
{{product.id}}
{{product.description}}
</div>
To use the *ngif as variable in alternative then template or else template, refer the variable prefixed with let keyword in <ng-template> element.
<div *ngIf="productItem as product;then productDetails">
</div>
<ng-template #productDetails let-product>
{{product.id}}
{{product.description}}
</ng-template>
*ngIf as will be very useful when the data is asynchronous and coming from an observable.
*ngIf with async pipe and observable example
We will bind some product data coming from an Observable to a component using async pipe.
<div>
<h3>Name:</h3>
<p>{{(product| async)?.Name}}</p>

<h3>Category:</dh3>
<p>{{(product| async)?.category}}</p>

<h3>Description:</h3>
<p>{{(product| async)?.description}}</p>

<h3>Price:</h3>
<p>{{(product| async)?.price}}</p>

</div>
We should use pipe on every property we want to display.
The problem with above approach is
- We are using pipe on every property, this creates subscription each time async pipe is used. In the above example we will create 4 subscriptions.
- To prevent this we can use rxjs share() operator to share subscription with multiple subscribers.
 productObservable: Observable<{}>;
      constructor() { }
      ngOnInit() {
        this.product= this.getAsyncData().pipe(share());
      }
- But the component view remains the same foreach property we have to use
asyncpipe and ? Operator - And we cannot display alternate template during the data load.
The ideal solution will be something like below
 if(product){
         //Display
         product.Name
         product.category
         product.description
         product.price
    }else{
       //Loading
    }
That is exactly what *ngIf will does with async pipe with observable by using *ngIf as syntax
<h1>*ngIf async pipe with observable</h1>

<div *ngIf="productObservable | async as productItem; else loading">
<div>
 <h3>Name:</h3>
 <p>{{productItem.Name}}</p>

 <h3>Category:</dh3>
 <p>{{productItem.category}}</p>

 <h3>Description:</h3>
 <p>{{(productItem.description}}</p>

 <h3>Price:</h3>
 <p>{{productItem.price}}</p>
</div>
</div>
<ng-template #loading let-productItem>
   Loading... (product is {{productItem|json}})
</ng-template>
we will dig into the code and see what is happening here
<div *ngIf="productObservable | async as productItem; else loading">
We are passing product observable to *ngIf with async pipe and storing it in productItem local variable.
Initially if product is null, it will show the loading template. Once product is available it will show inline template of *ngIf
The above code with *ngIf is very clean and easy to understand. We are removing unwanted safe navigation operator(?) and multiple subscriptions.
ngIf NullInjectorError: No provider for TemplateRef! error
If you miss writing asterisk before ngIf you will get following error.
<div ngIf="display"></div>
ERROR Error: StaticInjectorError[TemplateRef]: StaticInjectorError[TemplateRef]: NullInjectorError: No provider for TemplateRef!
Summary
*ngIfis a directive and can be applied on any HTML or angular component.*ngIfevaluates the given condition & then renders the “then template” or “else template”.- The default templates of *ngIf are “then template” which is inline template of ngIf and “else template” is blank.
- We can write *ngIf else blocks by using
<ng-template>element. - We can use logical operators like AND (&&), OR (||), NOT (!) inside
*ngIfto work with multiple conditions. - We can avoid “Cannot read property of undefined” errors using
*ngIf - While working with observables, We can avoid multiple subscriptions and safe navigation operators by using
*ngIfdirective.