The best way to learn Angular 7 (or Angular) is to setup our own local development environment. In this tutorial, I will explain how to setup local development environment for Angular.
Before reading this article, I would recommend to read following article if you have any confusion regarding Angular 2 and Angular 4 or any other versions.
The local development environment setup for Angular 7 and Angular 6/5/4 are same.
Prerequisites:
Install Node.js and NPM:
Angular 7 requires to install latest version of Node (Node 6.9.0 or higher). Please go through Node.js website for installing Node in different operation systems like Window, Mac or Linux.
Node Pack Manager (npm) is installed as part of Node installation, npm version should be 3.0.0 or higher. $npm –v for version check-up.
Is node required for Angular 2?
Install TypeScript:
Angular 7 is written in Typescript.
Install Typescript using below npm command $ npm install -g typescript (typescript version should be 2.1 or higher)
$ npm install -g typescript
Install Latest browser:
I would recommend you to use Google Chrome to develop Angular Apps.
Install Code Editor:
There are so many free code editors available such as notepad++,sublime etc. But my favourite editor is Visual Studio Code.
Install IIS on Windows:
In windows environment you many have to install IIS internet information service to run web server locally.
Installing Angular CLI:
Creating an Angular app is not easy thing, and if you are new typescript and Node.js it’s really confusing there are few pre-configurations we need to do.
To make our job easy Google came up with the utility called Angular CLI. With Angular CLI we can create and manage apps from command line. We can generate components, routes, services and pipes with a simple command line interface.
If you are from C# background and knows about Visual Studio. You can think AngularCLI as simple scaffolding tool. While creating new Asp Net MVC applications visual studio does scaffolding to generate CRUD operations and creates few lines of auto-generated code. That is exactly what AngularCLI does.
Install Angular CLI by using following command line.
npm install -g @angular/cli
After successful installation type ng-v it should return version of ng as shown below.
Now we are ready to create our first Angular Application.
Creating first Angular Application
Type the following command to create our first application
ng new my-angular-app
It will take some time to create the project.
Now go the created folder
cd my-angular-app
And type
ng serve
Now navigate to http://localhost:4200 you should get appworks in browser.
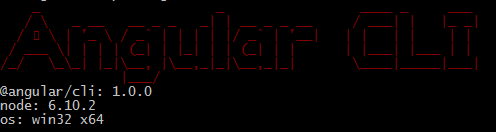
Angular CLI version
Change the port number in Angular CLI:
Sometimes you might get following error if the port is already in use.
Port 4200 is already in use. Use ‘–port’ to specify a different port
To change the port number just type
ng serve --port 1234
Now our application will be running on http://localhost:1234
Now go through the Hello world example to write your first app in Angular 7.