I will explain how to create an Angular 7 app with a simple “Hello World” example. This hello world example work in Angular 4,Angular 5,Angular 6,Angular7.
Let us start with Angular Hello World example to know the basics of Angular 7.
Before reading further, please go through my previous tutorial on how to setup local development environment for Angular.
Setup Angular in Local Development Environment
We will use Angular CLI as mentioned in the above tutorial to create our Angular application.
Here are the steps to create first hello world application in Angular 7
Creating First Angular 7 Hello World Example
We create a project called Hello World in Angular 7.
I recommend you to create a folder in your local disk so that all Angular examples are one place.(For instance create a folder named AngularExamples).
Open command prompt navigate to created folder; use the ng new command (Angular CLI) to create a new Angular project from scratch.
ng new hello-world-angular
It will take some time to create new project.
If you are using latest version of Angular CLI by default it uses Angular 7 (i.e., latest angular version). And there is no much difference between Angular 2 or Angular 4 or other versions it’s just an update. Please go through the following article to know more about this versioning of Angular.
Is it Angular 2 or Angular 4 or Angular?
After successful completion, you should see following message.
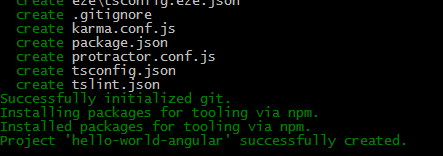
hello-world-angular-created
Project “hello-world-angular” successfully created.
Now navigate to the created ‘hello-world-angular’ directory.
Use your favourite editor (my choice would be visual studio code) open the created folder. The directory structure will be something like below.
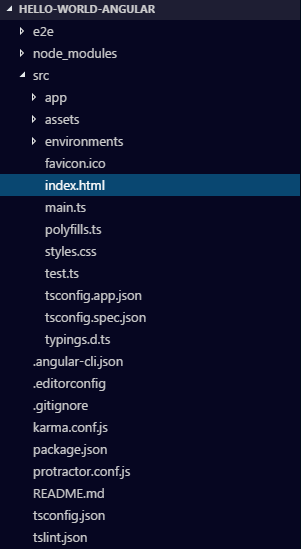
Angular Directory structure
This structure may vary depending upon the version of Angular CLI version (this article uses latest version of Angular CLI so it would be Angular 4).
Navigate to D:\AngularExamples\hello-world-angular\src\index.html file.
<!doctype html>
<head>
<meta charset="utf-8">
<title>HelloWorldAngular</title>
<base href="/">
<meta name="viewport" content="width=device-width, initial-scale=1">
<link rel="icon" type="image/x-icon" href="favicon.ico">
</head>
<body>
<app-root>Loading...</app-root>
</body>
</html>
You can see <app-root> tag this where our application will be rendered.
In Angular 2 (or Angular) world, we can create our own HTML tags & give them custom functionality, we will call them “Components”.
App-root is component auto generated by Angular CLI.
Now in command prompt type
ng serve
Then browse http://localhost:4200 it will show App Works as shown below.

Angular CLI Sample Example
Creating a Component in Angular 7
We will create a component using Angular CLI command.
ng generate component hello-world
It will create four files as shown below
- src/app/hello-world/hello-world.component.css
- src/app/hello-world/hello-world.component.html
- src/app/hello-world/hello-world.component.spec.ts
- src/app/hello-world/hello-world.component.ts.

Angular Hello World Component
Open “hello-world.component.ts” file in editor.
import { Component, OnInit } from '@angular/core';

@Component({
selector: 'app-hello-world',
templateUrl: './hello-world.component.html',
styleUrls: ['./hello-world.component.css']
})

export class HelloWorldComponent implements OnInit {

constructor() { }

ngOnInit() {
}

}
This is a simple component written typescript.
If you know java or C# it is easy to understand but do not worry, we will understand each line one by one.
Here we are declaring a class named “HelloWorldComponent” which is a component.
Importing Dependencies in Component in Angular 7
First line tells the compiler that import “Component” and “OnInit” objects from @angular/core (node module installed when we created project via Angular CLI).
Component Decorators in Angular 7
After importing Component object, we have to tell the compiler that this class is a Component.
In Angular 7 (or Angular) we will use Decorators in typescript to do this. So Decorators are nothing but metadata added to our code.
For example in \hello-world-angular\src\app\app-module.ts file, Decorator tells that it is a class named “AppModule” which is a Module (NgModule).
@Component({
});
@Component({
selector: 'app-hello-world',
templateUrl: './hello-world.component.html',
styleUrls: ['./hello-world.component.css']
})
Component Contains Three important declaration
Selector in Angular 7 component
Selector property indicates the tag name we are going to use in DOM.
<app-hello-world></app-hello-world >
(While creating component we gave name as “hello-world” Angular CLI added app as prefix).
TemplateUrl in Angular 7 Component
<app-hello-world> tag uses hello-world.component.html file as html template. So whenever we use <app-hello-world></app-hello-world> it will display the contents of file HTML located in
\hello-world-angular\src\app\hello-world\hello-world.component.html
Instead of giving templateUrl we can use inline html also. As shown below
@Component({

selector: 'app-hello-world',
template:` <p>
hello-world works!
</p>`,
styleUrls: ['./hello-world.component.css']

})
For small html contents, we can use inline html template. HTML in between backticks(`….`).
It is better to use separate template because most of the code editors do not support syntax highlighting in inline HTML strings.
styleUrls in Angular 7 Component
This property tells the compiler that use the styles located in hello-world.component.css for this component.
These are the main properties in Components in Angular 7 (or Angular)
Now open \hello-world-angular\src\app\app.component.html file and add the created component as shown below.
<h1>
  {{title}}
  <app-hello-world></app-hello-world>
</h1>
Now refresh the browser
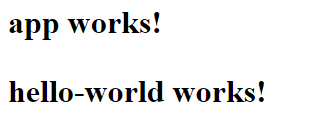
Hello world angular example
Adding Data to the Component in Angular 7
We have rendered static template, now we will add some data to the component.
Open “hello-world.component.ts” file in editor.
And add the name property as shown below.
name:string;
We are declaring a property or variable named “name” which is a string type. This is similar to declaration of variables in object-oriented languages. If we assign any type other than string the compiler will throw error.
import { Component, OnInit } from '@angular/core';

@Component({
selector: 'app-hello-world',
templateUrl: './hello-world.component.html',
styleUrls: ['./hello-world.component.css']
})

export class HelloWorldComponent implements OnInit {

name:string;

constructor() {

this.name="AngularJs Wiki"

}

ngOnInit() {
}

}
In constructor we will assign name variable. Constructor will be called whenever we create a new instance of a class. Similar to C# or Java language.
Rendering Angular 7 template
Now we have to use the declared variable in our template file i.e., HTML file. We have to use two curley brackets to display the value of variable {{ }}. We will call them template tags.
To use the name variable open the template file hello-world.component.html
<p>

hello-world works!
{{name}}

</p>
As the template bind to component(hello-world component) whenever compiler encounters flower brackets(i.e., template tags) it will replace the text with bounded property (i.e., name) value i.e., ”Angular Js Wiki”.
Now refresh the browser
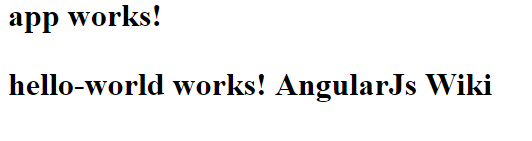
hello world angular example with data
I hope you understood the basics of Angular 7. If you have any doubts or suggestions feel free to comment.